Step by Step Windows XP Installation with Image Included!Start
your computer and insert the XP disk. If your computer supports booting
from a CD you may need to change the bios startup options. The key you
press to access the bios may differ depending on the make of your
computer. Most use the DELETE key, if not then it will be one of the
FUNCTION keys (F1, F2, etc.) Save changes and exit. If your computer
does not support booting from CD then insert the first Windows XP
floppy disk. Special :thanks: to TweakHound who create this procedure...
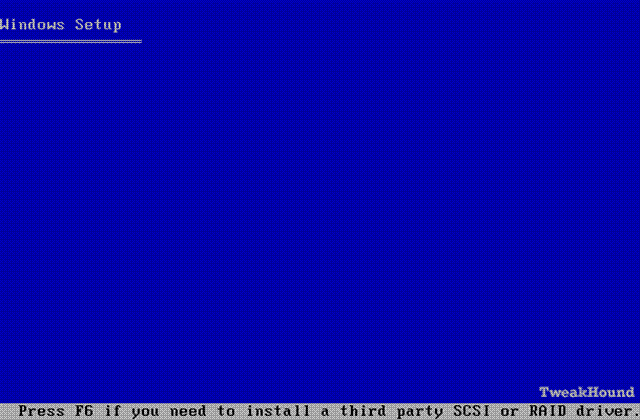
As the system boots you will see a message at the bottom of the screen:
"Press F6 if you need to install a 3rd party SCSI or RAID driver." If you do, follow the instructions.
Now
setup begins. If you had another Operating System on your computer you
will be asked what type of installation you want to perform. NEVER,
EVER UPGRADE AN OPERATING SYSTEM!!! You will perform new installation.
There
are many reasons to do a clean installation rather than an upgrade.
They all boil down to 2 important ones. Less chance of errors and
performance.
Clean Installation Preferred
When benchmarking
Windows XP, Microsoft strongly recommends a clean installation using
NTFS. There are several reasons why performance for a clean
installation will tend to be superior to that for upgraded systems. An
upgraded system will constrain the placement of files and file system
data. The old disk format may not use an optimal file system cluster
size. In a clean installation, the placement of file system data on the
disk and the internal organization of that data can be optimized,
resulting in a smaller system footprint and fewer and faster I/Os when
using the system.
When performing a clean install, Microsoft
recommends that NTFS be used and that the system be installed in a
single partition on each disk. Under Windows XP, big partitions are
better managed than in previous versions of Windows. Forcing installed
software into several partitions on the disk necessitates longer seeks
when running the system and software.
If you do choose an upgrade
from Windows 2000 or Windows 9x, you may be working with a FAT32 file
system. Performance will generally be better if the file system is left
as it is, rather than converted to NTFS. A partition converted from
FAT32 to NTFS may have to use 512-byte clusters, rather than 4096-byte
or 8192-byte clusters, which can result in a higher number of
fragmented files.

Next comes the ever popular EULA, press F8 and move on.

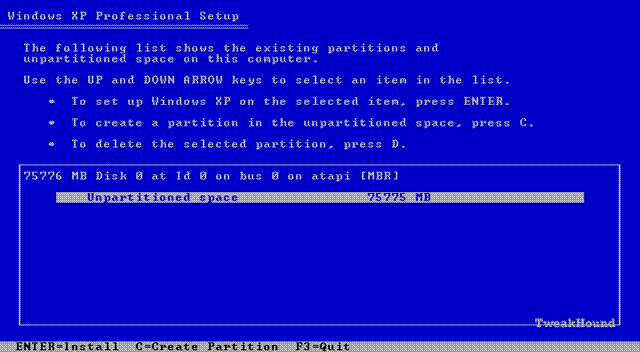
If there are partitions on your drive press D to delete them. Then press C to create a new partition.
If you create or resize partitions BE CAREFUL, you will destroy data on
other partitions if you do this. On a computer with a single hard drive
I usually use a partition of around 10gb for Windows XP. I install the
applications on the same drive and I use a backup program. It makes
things easier. If you desire the utmost speed and efficiency, put
Windows XP and the applications on a drive by itself with no other
partitions. Given the size of hard drives these days this may be
expensive and/or impractical. After pressing C the following screen
will appear. Type in a size for your partition and press the Enter key.

If everything looks right, use the arrow key to highlight the correct partition (should be C:) and press the Enter key.

Format
this partition using NTFS. Personally I think it's best not to use the
"Quick" option. Using the standard option checks the disk for bad
sectors. This will take a while. Some people have asked "I've heard
that FAT32 is faster, why use NTFS?" First NTFS is only about 1-2%
slower than FAT32 and only on drives/volumes 32GB in size or smaller.
It is faster because of the overhead created by the security of NTFS.
Second, you can eliminate the majority of that overhead by following my
tweak guide. Third, the aforementioned security is exactly why you
should use NTFS!

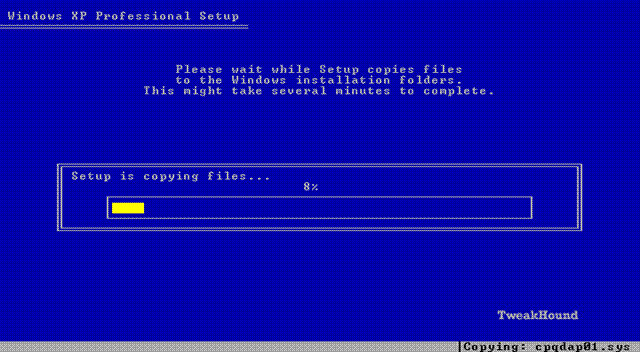
After
formatting the setup files will be loaded and the system will reboot.
At this point if you had a floppy in the drive then remove it.

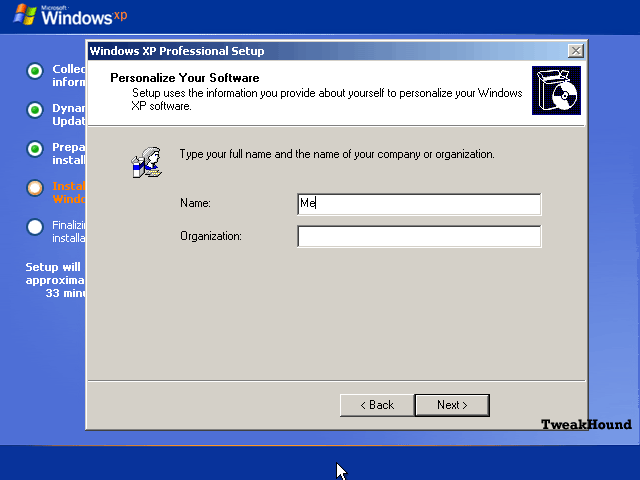
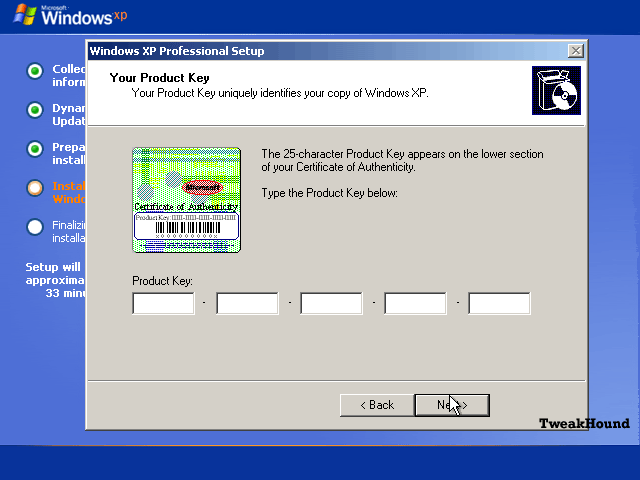
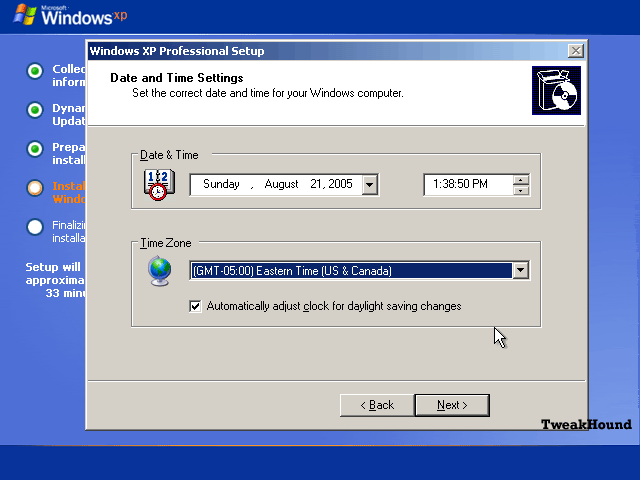
As setup begins you'll be asked to fill in some info. Most are self-explanatory.

Windows will ask for Region and Language (the default is U.S., English)

Your Name. First name will do.
Your CD shipped with a Product Key. Enter it now.
Computer Name and Administrator Password

Time Zone, Date & Time
Network Settings. Leave it as is.
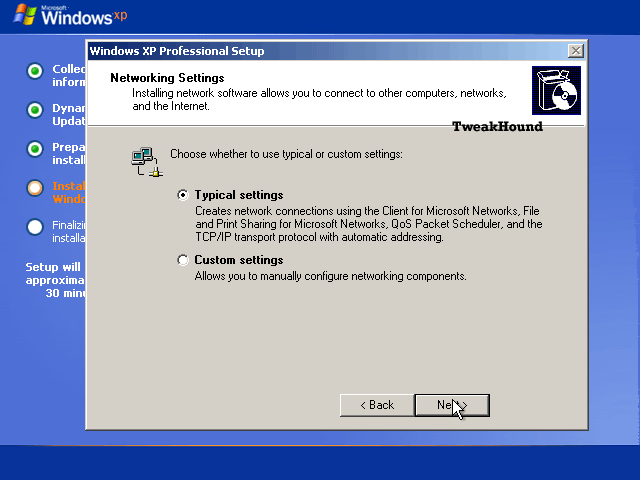
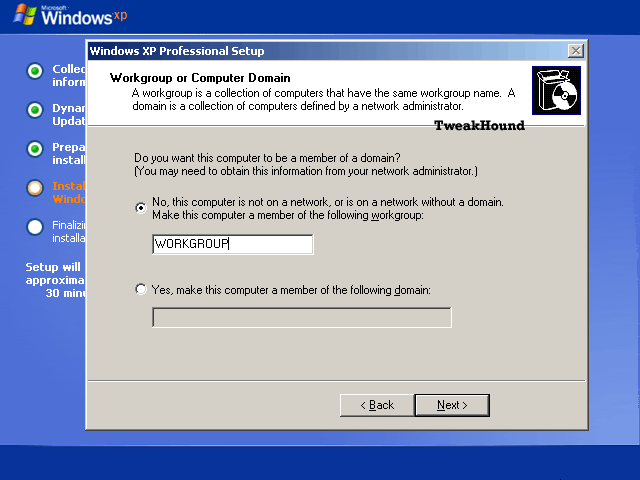
Type in your workgroup name or leave as is if you don't have one.
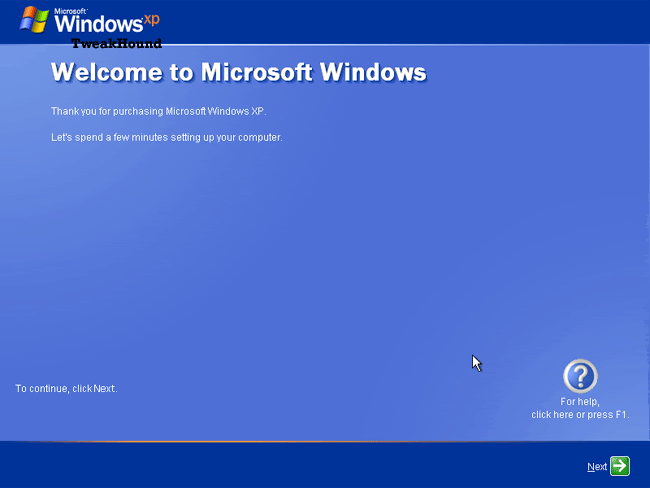
When the basic install is finished you'll see this screen. Click Next.
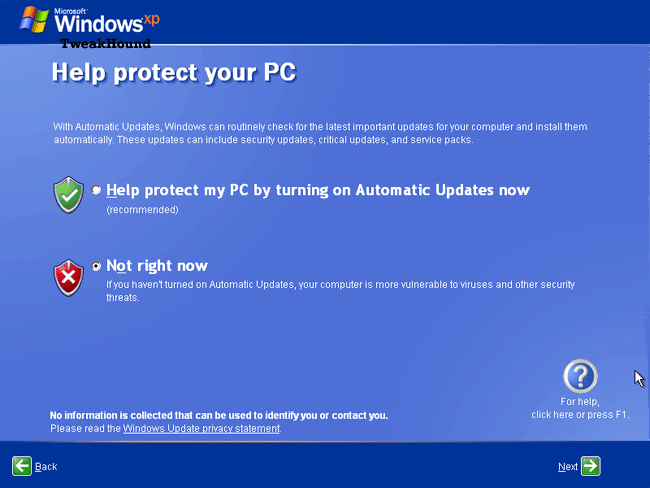
Choose your option and click Next.
Choose your option and click Next.

Absolutely DO NOT Activate yet! Click Next.

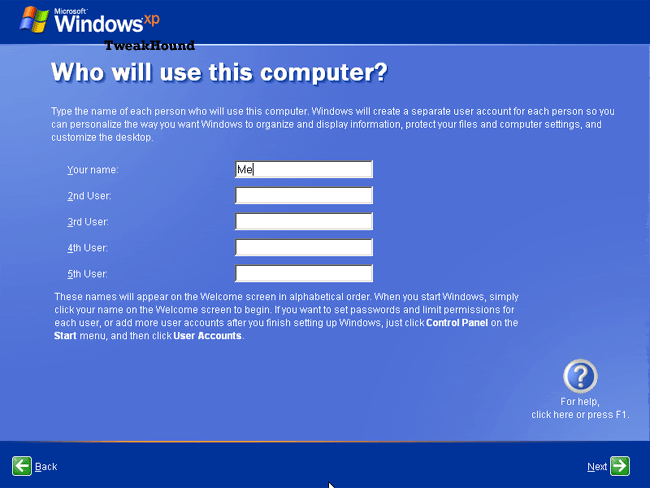
Fill in the appropriate info and click Next.
Finished!

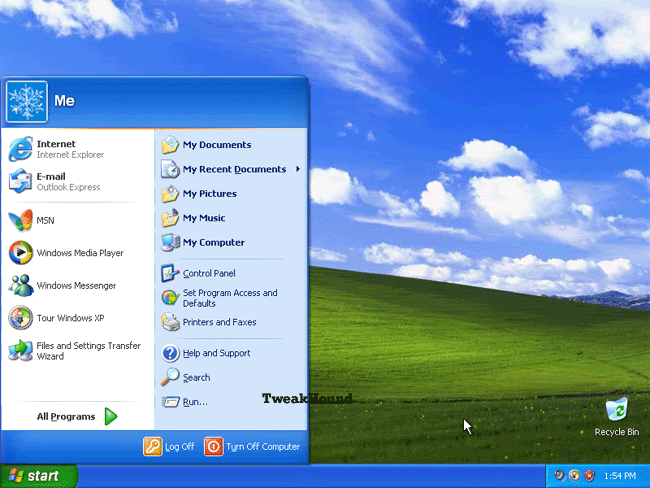
What the first screen looks like: